Recently, Cait asked me what kind of strength equipment I recommend that she buy; what began as a short Instagram message grew to a long email. That email has now transformed into the post you’re reading. Many people are starting to get into powerlifting and want to increase their strength in the big three (squat, bench, and deadlift) but have no idea what to buy, what equipment to start with, and how much to spend. This article will guide you through the most common types of equipment, how they work, and how to go about choosing what is best for you.
Disclaimer: Although I am very passionate about strength training and fitness, I come from an engineering background. The engineer in me usually sneaks in while I am writing.
Must Haves:
Shoes:
The purpose of powerlifting is to lift the heaviest weight in the squat, bench press, and deadlift within the federation’s rules. Luckily, only one force acts on the bar in all three of these lifts: gravity. If you ever took high school physics you will know that the force of gravity only acts straight down (that is, vertically--there is no horizontal component). Given this, the most efficient way to lift will be to produce a force directly opposite to gravity; i.e. straight up. Keeping this in mind I will delve into the different types of shoes best fitted for this task.
Running/Cross Trainers
At face value, common running shoes and cross trainers appear to be the best shoes to wear to the gym. This, however, is far from the truth when dealing with strength training. The common element with running shoes is the cushioned sole. The purpose of the cushion is to disperse the impact forces to the outside of your feet. This is needed when running and jumping. Strength training, on the other hand, is not an impact sport, but essentially a static sport. The impact forces are minimal in the big 3. Take for example the top of the squat--the bar is loaded on your back and the force of gravity is acting straight down. That force transfers all the way down your body until it reaches your shoes wherein the cushion disperses the weight to the outside of your feet. All these forces have to be counteracted somewhere else, usually your knees and hips. Before you even begin the squat you already have instability in your knees, hips, and back (and people wonder why they get pain from squatting). A stable foundation is required before you can begin the lift. Don’t lift in runners, period.
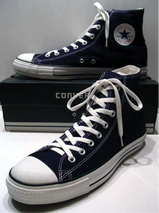
On the opposite side of the shoe spectrum are those with a thin sole. The less material between you and the ground, the more force that gets applied to lifting the weight. Chucks have been a go-to shoe in powerlifting for decades; why? Because they have next to no sole and they are low cost. Best of all, they are highly customizable, they come in virtually every colour imaginable, and will fit anyone’s personality. I highly recommend Chucks if you are interested in strength training; they are definitely the shoe to start with.
Minimalist shoes - $40-$150
There are a wide variety of shoes here but the basic principle is all the same--as little a sole as possible to mimic being barefoot. Similarly to Chucks, these are excellent for lifting, but they do come at a higher price point. I recommend you purchase these if you find Chuck Taylors uncomfortable or you simply prefer the design.
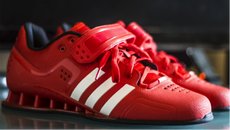
Weightlifting shoes seem to be the biggest fad in strength training. So many new brands are coming out and there is so much hype all around them that it is very easy to get caught up in their marketing. I will break down the function of every weightlifting shoe out there in a few bullet points:
- Designed for Olympic weightlifting but for our purposes they are only used in squatting
- Hard Sole - acts as an extension to the ground. This is good and allows you to apply a maximal force to the bar
- Elevated heel - makes it significantly easier to get into a deep squat while keeping a neutral spine. This is a bandaid to poor ankle and hip mobility.
If you are just starting off in powerlifting I DO NOT recommend you buy a pair right away. #1- they are expensive. #2 - work on your mobility to ensure you can get in a below parallel squat in flat soled shoes. Once you get more accustomed to squatting and have some experience lifting, then begin looking into getting a pair. Don’t jump the gun too early and automatically assume you need weightlifting shoes. When you are ready, these are some things to look for:
- Cost - I only know of one brand that sells weightlifting shoes under $100 so be prepared to spend
- Heel Height - The higher the heel the easier it will be to get deeper into a squat
- Fit - These are not the most comfortable shoes around; make sure to try them on to see if you can tolerate being in them
Belts:
These are all too common in a gym; bodybuilders, weightlifters, powerlifters, and average Joes all wear a belt in the gym. Why? Because it protects the back of course! Yes and no. Wearing a belt definitely does help to keep your back safe but not for the reasons most people think. Wearing a belt will help stabilize your core and if you properly use a good belt it will essentially mimic an external core. To understand how, we are going back to high school physics:
Sir Isaac Newton’s Third Law: For every force there is an equal and opposite reaction force.
It took me a while to really understand what this means but the best way to describe it is with punching a wall. Go ahead--try and punch a hole in the wall. Whatever force you apply to the wall the wall will apply that exact same force onto you. You are just as likely to break your hand as you are to put a hole in the wall; what matters is who can handle the force better.
Back on topic, belts. When you press your core against a belt, the belt will apply the exact same force back onto your core. This can greatly increase your intra-abdominal pressure increasing your stabilization. Presto, you now have a second set of abs. This brings me to the first style of belts.
Bodybuilder belts - $20-$40
You can buy these in most department stores (your first flag as to why not to buy them); they are typically designed with a wide backing and taper to a skinny front. To get the most out of your belt you want to apply the biggest force to it (so it can return that force back to you). This is done by bracing your core and pressing against the belt. For normal people this is done by pushing out your stomach (extremely simplistic terms). I don’t know anyone who can greatly push out their low back. There is very little surface area on the front of the belt to apply any force back. There is some, but not much. If you already own a bodybuilder belt and want to use it to squat, wear it backwards so the wide part is against your stomach.
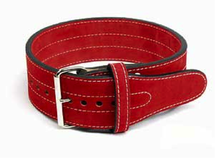
Powerlifting belts were designed for--you guessed it, powerlifting. These belts are the same width the entire length of the belt (generally 10cm or 4 inches) and can be 10mm or 13mm in thickness. They also come in 2 styles, pronged and lever. Given that these belts are the same width all the way across and that the surface area you can press against is maximized, this leads to the greatest possible support. These belts should only be used on heavy working sets; light warm-ups do not require wearing a belt. To get the most out of your belt you want it tight, uncomfortably tight! If you can keep it on throughout your entire workout you are not wearing it anywhere near tight enough.
Pronged Belts
These are your typical belt; they come in either single or double pronged. The benefits of using a pronged belt is ease in adjusting how tight the belt will be. Depending on the lifter you may prefer a tighter or looser setting for squats as opposed to deadlifts. A prong makes it easier adjust. Single pronged belts are easier to put on while double pronged offer more support. I personally prefer double pronged.
Lever Belts
Lever belts lock in using a lever mechanism. This style of belt allows you to get the belt tightness extremely quickly and does not require the help of a training partner. It is also extremely easy to loosen the belt (after a heavy one-rep max on squats, you want to relieve the pressure as fast as possible). The downside is that it requires a screwdriver to adjust tightness. If your waist stays relatively the same size and you like the same setter for squats and deadlifts, buy a lever belt.
(I have my theories as to why lever belts can actually add more weight to your lift compared to the equivalent pronged belt. If you’re interested in this explanation, email me).
Note on Belt Thickness:
Powerlifting belts come in two thicknesses 10mm and 13mm. All you really need to know is that the greater the thickness the greater the potential support it can provide. For 90% of lifters a 10mm will more than suffice for any lift.
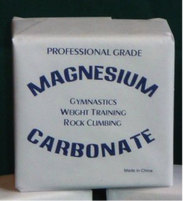
This is a must for any lifter. If you can’t hold onto the weight, how do you ever plan on lifting it? Chalk works by absorbing moisture and increasing friction between you and the bar. Not every gym allows chalk as it causes a mess; if this is the case you should find a new gym! Seriously though, liquid chalk is another option. This has a similar effect, but if you have any cuts on your hands it will burn.
Nice to Have:
Lifting Straps $10-$15
I know, blasphemy! But used sparingly in a proper lifting program they can greatly increase your strength. Lifting straps (mainly used for deadlifts) transfer the weight from your grip to your wrists, literally strapping the bar to you. When your grip is the limiting factor on your deadlift and you want to increase the weight, straps will allow for the added weight. Be cautious to not become overly dependent on straps as they will greatly hinder your grip strength. If your gym does not allow chalk, the case for lifting straps becomes much stronger. At such a low cost, they aren’t needed but are good to have.
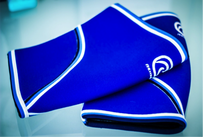
Knee health is a major concern with all lifters; if you have ever had a knee injury you know it can be debilitating. Knee sleeves come in varying lengths, thicknesses, and materials, the most common being 7mm Neoprene knee sleeves. These sleeves are not designed to add tremendous support to the knee; their function is to keep the knee warm while you are lifting. Many of the newer brands are made to fit extremely tight on the knee. At the bottom of the squat this creates a spring effect and allows the lifter to recoil out of the hole. This can add poundage to your squat, albeit not to the same level knee wraps (will not be discussed in this article). I recommend the original blue Rehband knee sleeves. A pair will cost around $100. For a beginner to intermediate lifter these will last many years and provide adequate support, comfort, and are relatively easy to put on. When determining the sizing of the sleeve follow, the guideline outlined by the manufacturer; I do not recommend going a size smaller for a beginner lifter.
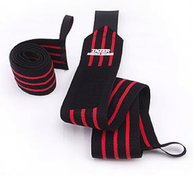
Wrist wraps operate by bracing the wrists to add additional support. Ideally used in pressing movements, many powerlifters utilize them while they squat. With certain bar positions there is a lot of undue stress on the wrists and, over time, this can cause pain. Similarly to belts, I recommend using wrist wraps for heavy working sets. Even while using them on working sets I prefer to use a “light” wrap for the majority of the sets. Using a tight wrap is best for near max lifts.
Wrist wraps come in a variety of different lengths and sizes. The material used can also have a significant effect on the support received. Many department stores sell really cheap wrist wraps roughly around 12 to 15 inches in length. These will not provide much support and should be avoided. Wrist wraps should be at least 20” long. Most manufacturers of powerlifting equipment supply wrist wraps 20 and 36 inches in length. The longer the wrap the more support you will receive. Before purchasing a pair, check the length rules for the federation you are competing in. Many will not allow you to compete with 36” wraps in the raw division.
Conclusion:
Who would have thought so much went into lifting a weight up and down? Which equipment to buy is highly personalized and dependent on many factors including, but not limited to, individual goals, training background, or any previous injuries. For someone who is looking to test the powerlifting waters I recommend starting off with the following:
- Pair of Converse All Stars
- 10mm prong powerlifting belt
- Box of lifting chalk
- Knee sleeves (only if you have had issues with your knees before or have extra money to spend)
If you have any questions about any of the equipment listed above or would like my recommendation on which brand to buy leave a comment below or send me an email.
Website: www.306strengthsystems.com
Instagram: @Nas306
YouTube: www.YouTube.com/nassimjebran

 RSS Feed